Are you struggling to let Google index your blog posts or product pages? I know how frustrating it is, after a long time of hard work on a 3000-word post or a beautiful and detailed product page, but Google just shows you “Crawled - currently not indexed” or “Discovered - currently not indexed”.
It’s made me crazy for a long time. I wanted to fix this annoying “bug”. I thought it was a bug for me because the quality of my posts is pretty awesome. I’ve never been a copycat. All of my articles are produced after detailed research. So there must be something wrong, my posts should definitely appear on the Google SERP(Search Engine Results Pages).
After thorough research on why Google didn’t index my pages, I found there’s a tricky way to make my pages indexed - Using Google Indexing API.
What is Google Indexing API?
According to Google Search Central, the Indexing API makes it possible for any site owner, like you and me, to request Google for a fresh crawl.
When I saw this Indexing API for the first time, I thought it should have the same result as clicking the “Request Indexing” button in GSC (Google Search Console). Both of them just inform Google to index our pages, right?

However, after I did more detailed research, I found something really tricky.
Rank Math, a WordPress SEO plugin, did a test on Google Indexing API. After they used the Indexing API to request, their fresh article got a featured snippet after a couple of hours! If you’re interested in the detail, their post is here 😀
https://rankmath.com/blog/google-indexing-api/

I’ve also done some tests on my different sites. As far as I’m writing this article, all of my pages get indexed within 24 hours, no matter if they are new pages or the old pages dead in the “currently not indexed” category before.
Why do you need Google Indexing API Chrome Extension?
Rank Math is a cool plugin for WordPress, no doubt.
If your website is based on WordPress and you happen to be a customer of Rank Math. Just Check RankMath’s official site and you can use the Indexing API easily.
However, if you don’t want to install another plugin in your WordPress, or if your site is based on other platforms, like Shopify, Webflow, Bigcommerce, etc. You should definitely check Google Indexing Chrome Extension.
You don’t need to install any plugins or apps on your site. To be honest, most third-party plugins or apps will influence your site’s performance more or less. I’m a minimalist and I always keep the plugins on my site as little as possible.
A Chrome extension will make the whole process easy. Just open the page that needed to be indexed, then click the extension, and voila, the page will be indexed super fast.
How to deal with "Quota Exceeded" in Google Search Console?
"Sorry--we couldn't process this request because you've exceeded your daily quota. Please try submitting this again tomorrow."
It feels so bad when I saw this pop-up warning at the first time.
In the past, request indexing in Google Search Console was so easy. Just click the button and everything will be settled down. However, the good old time was gone and there is a limitation on indexing request.
According to my test, the daily quota is around 10 urls. If you have more than 10 pages that need to be indexed, you have no choice but wait until the next day.
Luckily, there is a way to bypass the daily quota limitation, which is using Google Indexing Chrome Extension. You will be able to send 200 indexing request per day, 20 times more than the GSC daily quota, and 99% of your urls will be indexed within the next 24 hours!
How to set up Google Indexing Chrome Extension
To be honest, the whole setting process isn't typically easy. That's why I create this step-by-step guide. Please follow all the steps in the guide and I'm sure you'll set up perfectly and then index your pages in no time.
Let's just jump right in.
Purchase the Google Indexing Tool
Click the GET STARTED button on the homepage or here.
Then you'll be redirected to the purchase page.
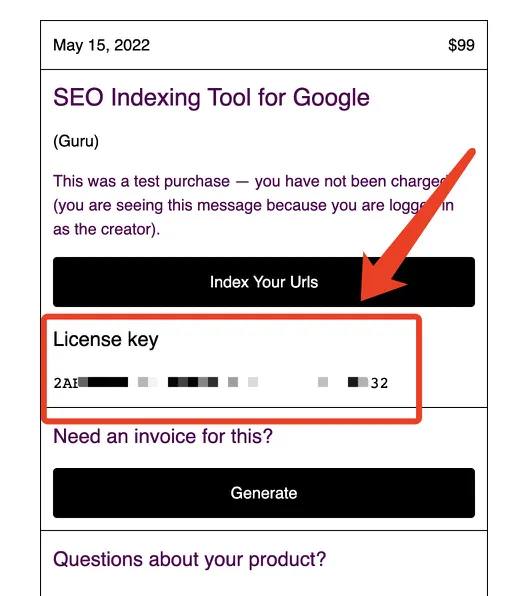
Make sure that the email is correct because the License key will be sent to your email.

The License Key will be sent to your email immediately.

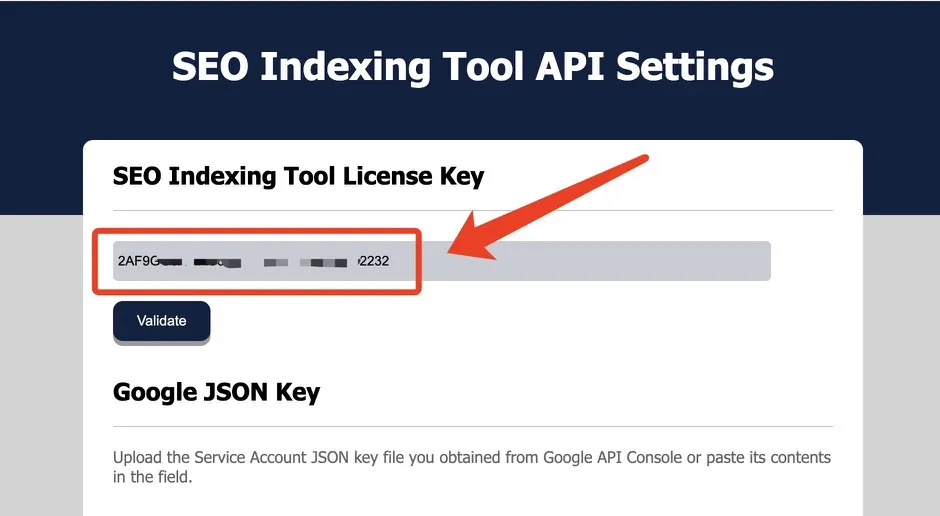
After you get your License Key, please paste it on the Chrome Extension's setting page.
Get the Google JSON Key
1. Steps to create Indexing API Project
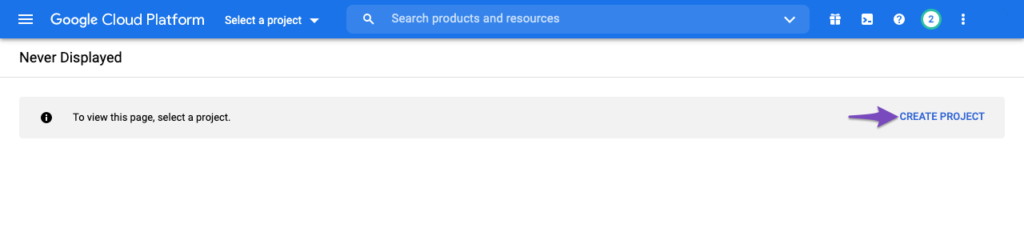
Go to Google Cloud Platform.
If this is your first time creating a new Indexing API project, just click the Create Project option.
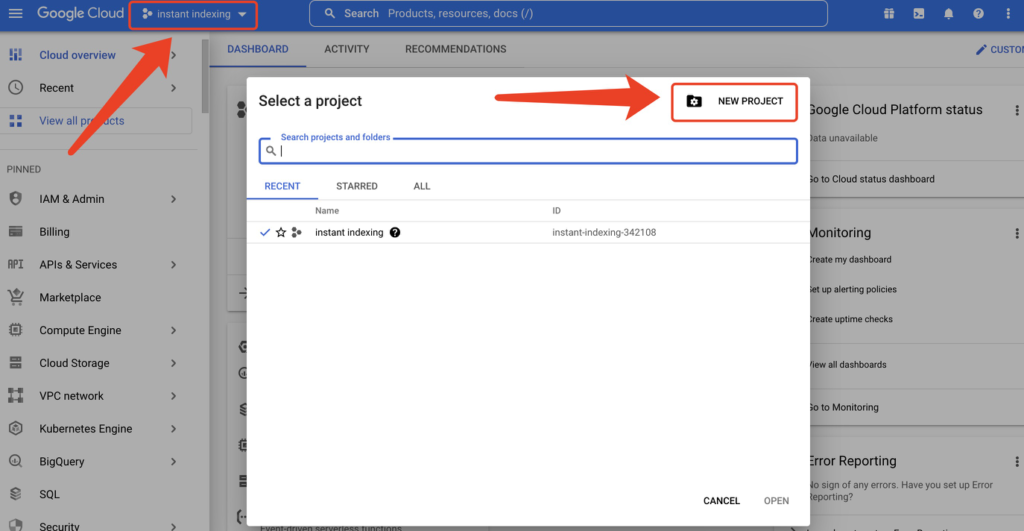
If you’ve already got some projects in your cloud platform, click the Select a project drop-down and choose New Project from the popup that appears on the screen.
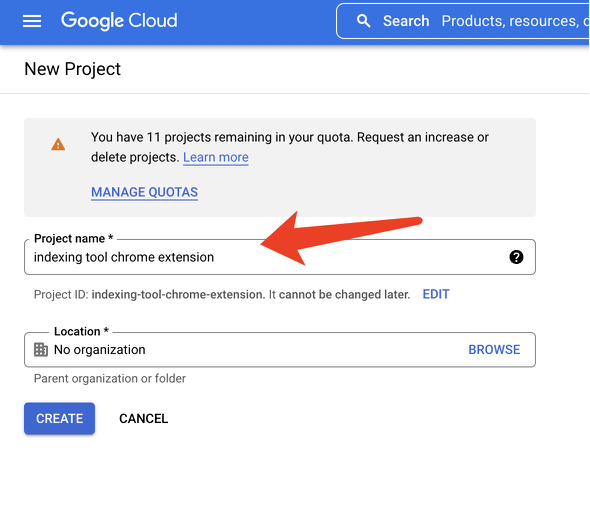
In the next step, enter a project name (name whatever you like) and then click Create.
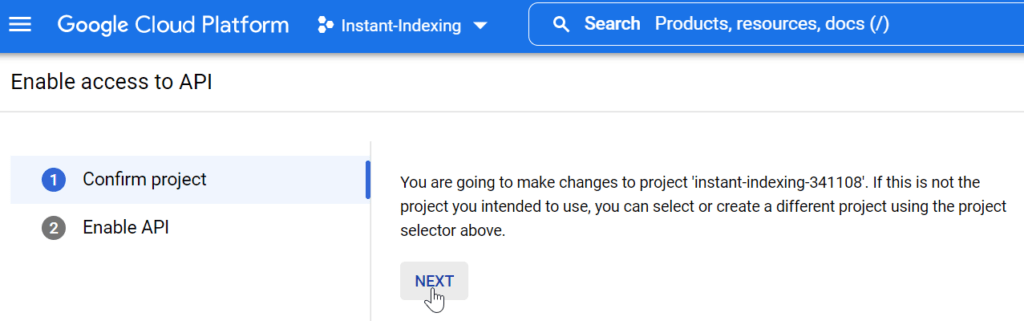
Once you’ve created the project, the page will be redirected to a new page. On the new page, you’d need to enable the project to access the API. Just click NEXT in the first step.
Then in the second step, click the ENABLE button to access the API.
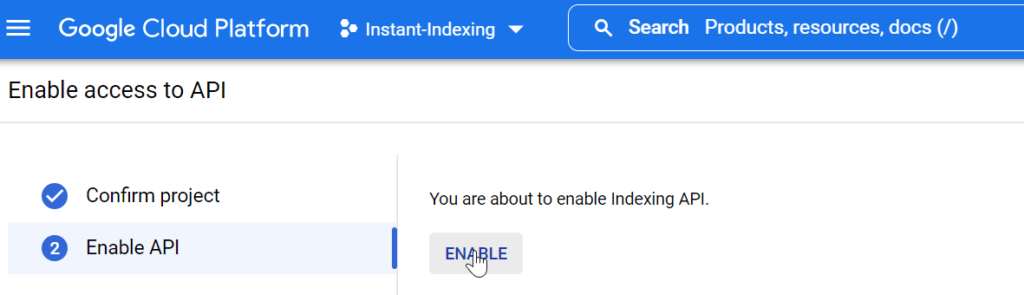
After you click the ENABLE button, you can close this tab.
2. Steps to Create Service Account
Now, you need to create a service account by opening this service accounts page.
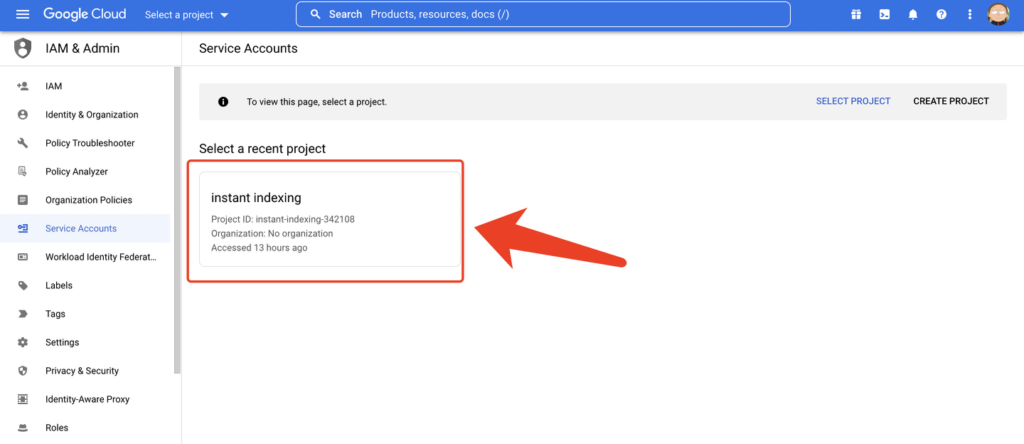
You will open the Google Cloud again and you will find the project that you’ve created before.
Click the project.
In the following page, you need to click the Create Service Account button.

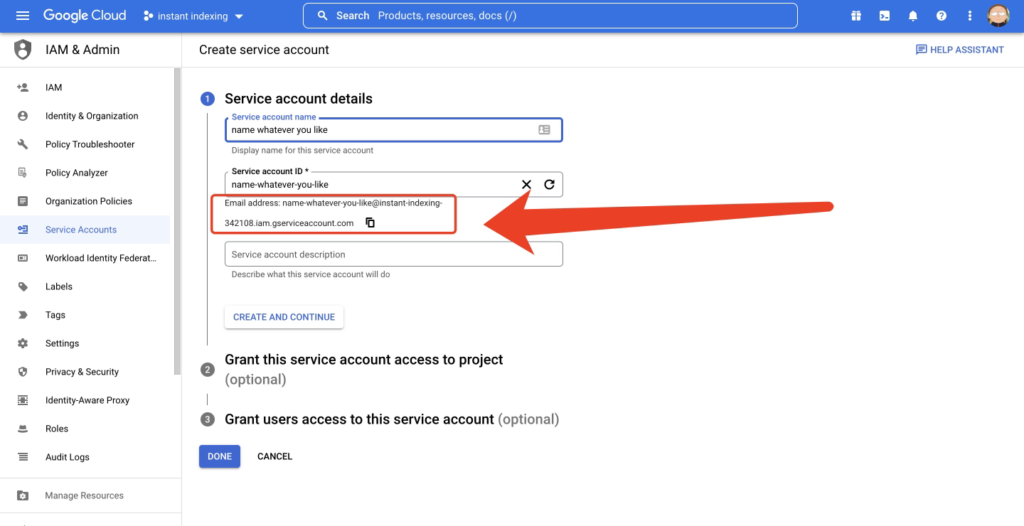
On the Create service account screen, enter a name and description for the new service account.
Select and copy the whole Service Account ID (the one that looks like an email address) because you will need it later.
Then, click on the Done button at the bottom:
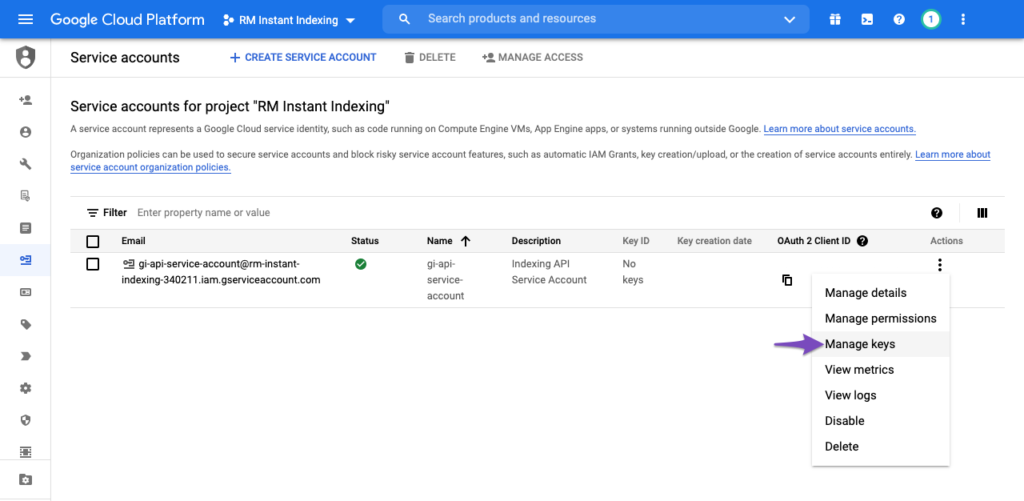
Next, you need to click the three vertical dots in the Actions column, and then select the Manage keys as shown below:
When you open the following page, click Add Key and then select the Create new key option, as shown below:
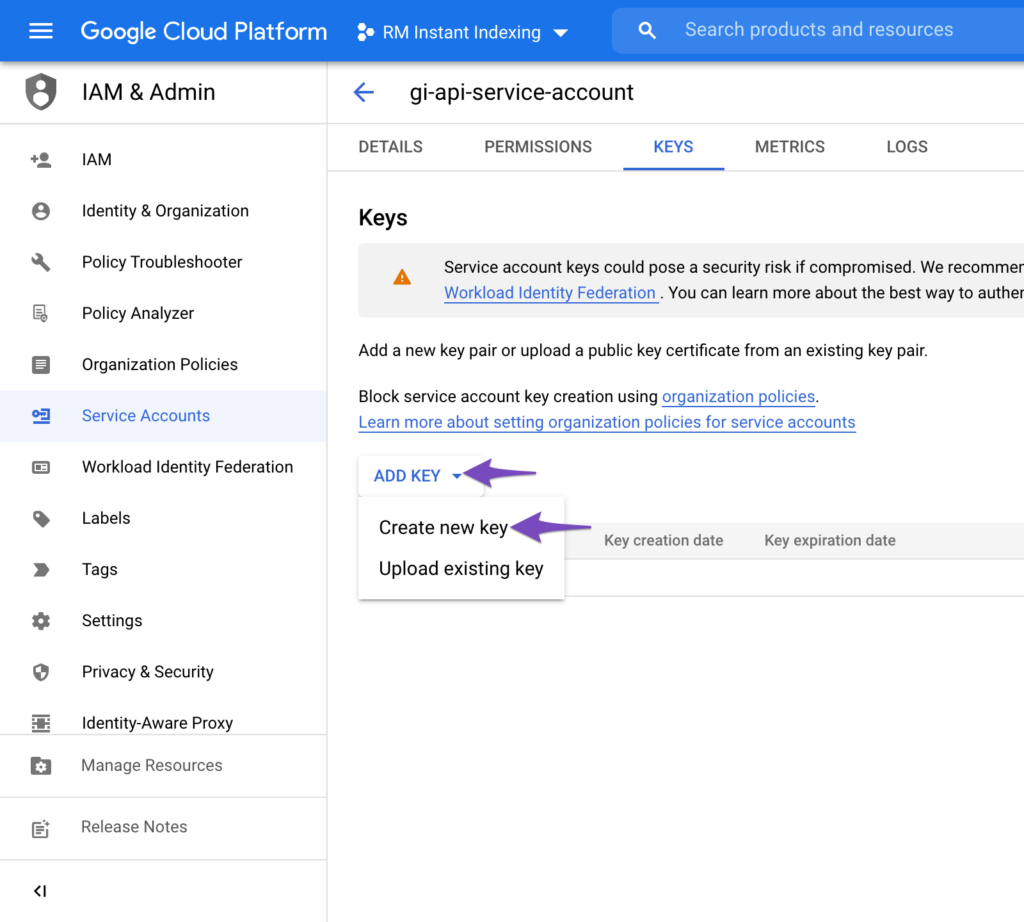
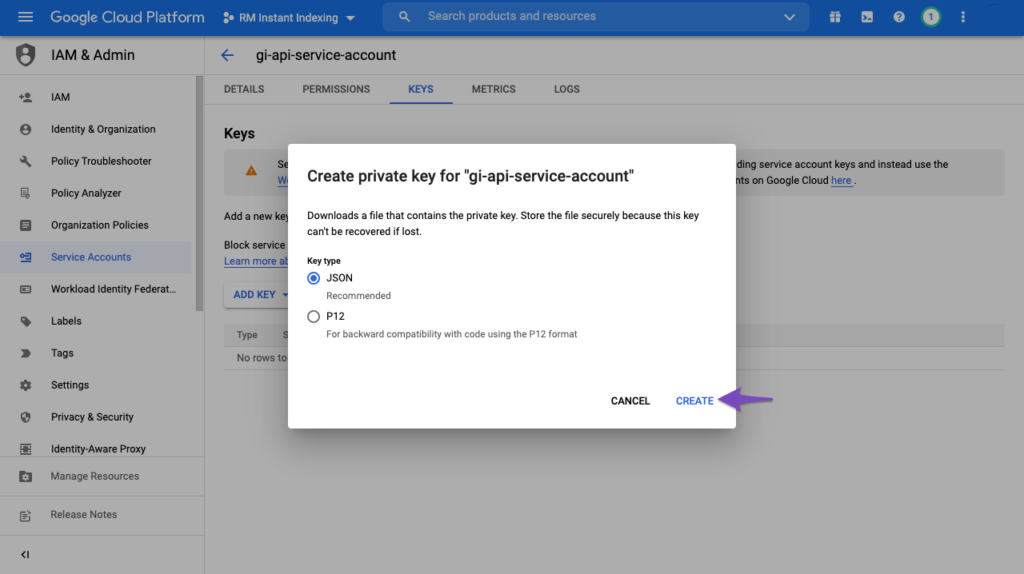
Choose the default JSON format when prompted in the overlay, and click Create:

Upon clicking Create, the .json file will be automatically downloaded in your browser, meaning you’ve successfully created the API key.
Please save this file and keep it on the desktop, because you’ll need it later.
Add the Service Account as an Owner in Your Google Search Console
If you’ve not used Google Search Console before, please refer to Google’s guide to add your property:
https://support.google.com/webmasters/answer/9008080
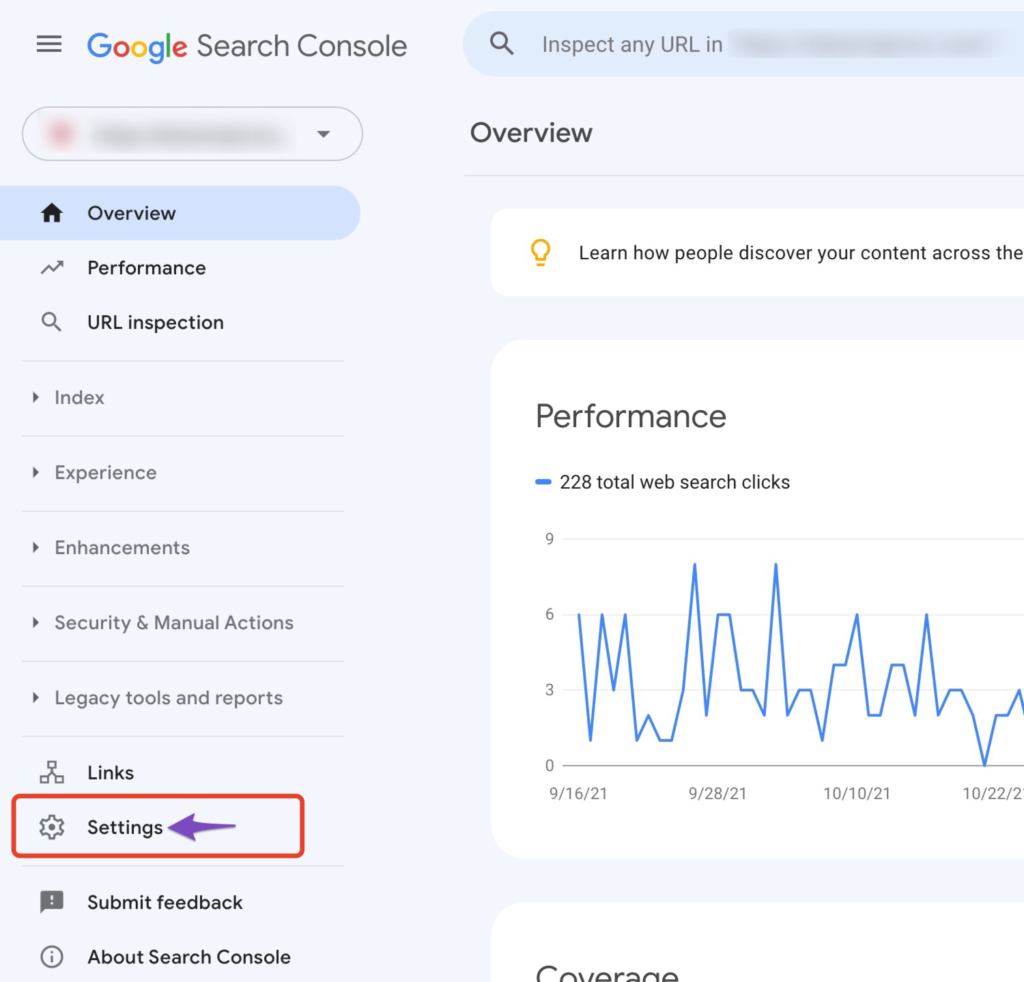
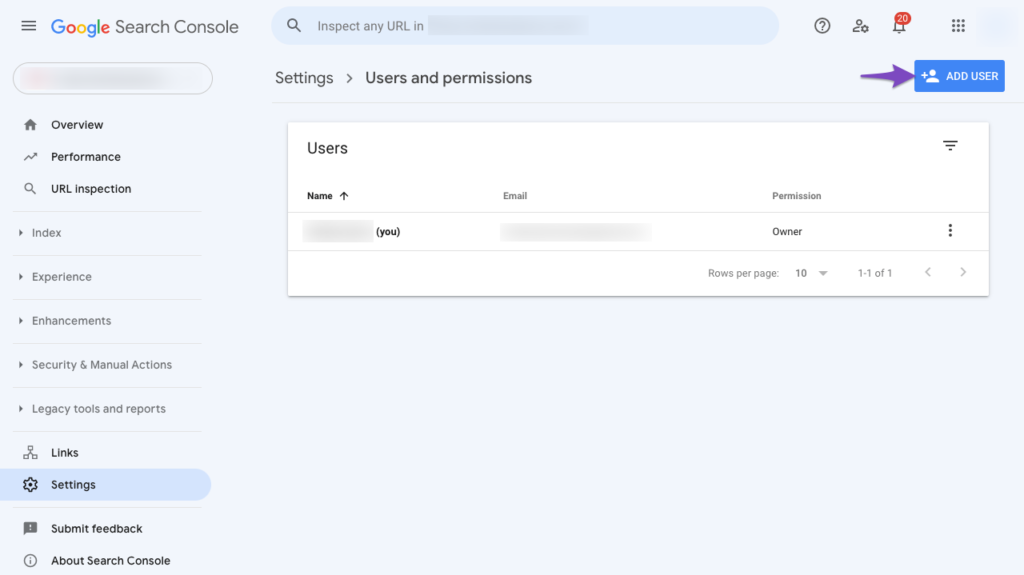
After verifying your property, open the Google Search Console, select your property on the left and then click on Settings near the bottom:
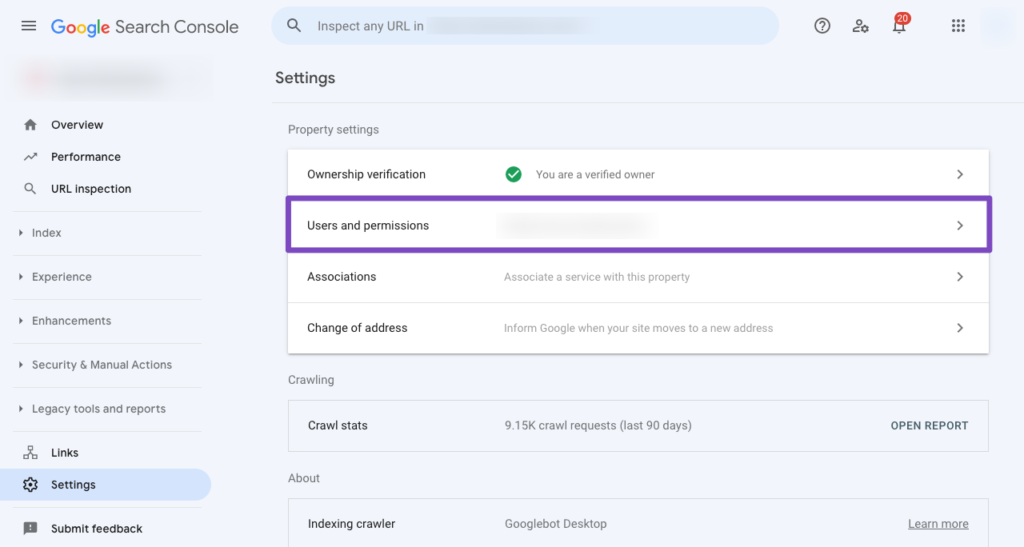
Click on Users and Permissions:
Click on the three dots next to your account, and then click on the Add User button:
A popup will now appear. Enter the Service account ID in the Email address field. Ensure that you’ve provided Owner level Permission, and then click Add.
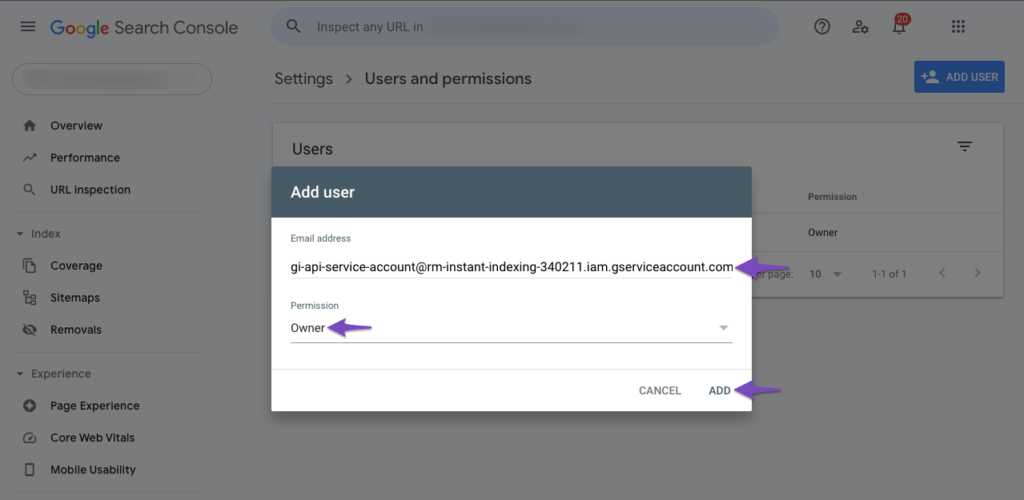
This is where you copied out the email address earlier:

After you add the owner permission, you can safely close the Google Search Console.
Configure the Chrome Extension of the Indexing Tool
Hold on! There’s only one step away from finishing all the settings 😀
Now you need to download the Indexing Tool from Chrome Web Store:
https://chrome.google.com/webstore/detail/seo-indexing-tool/cljmfkdomaigecbgmhfanmlnpndfnlnj
Click the Add to Chrome button and you’ll install successfully.
Then open the extension and click Settings.
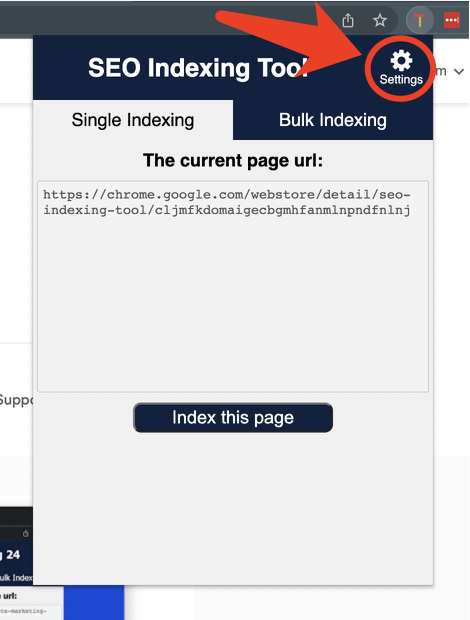
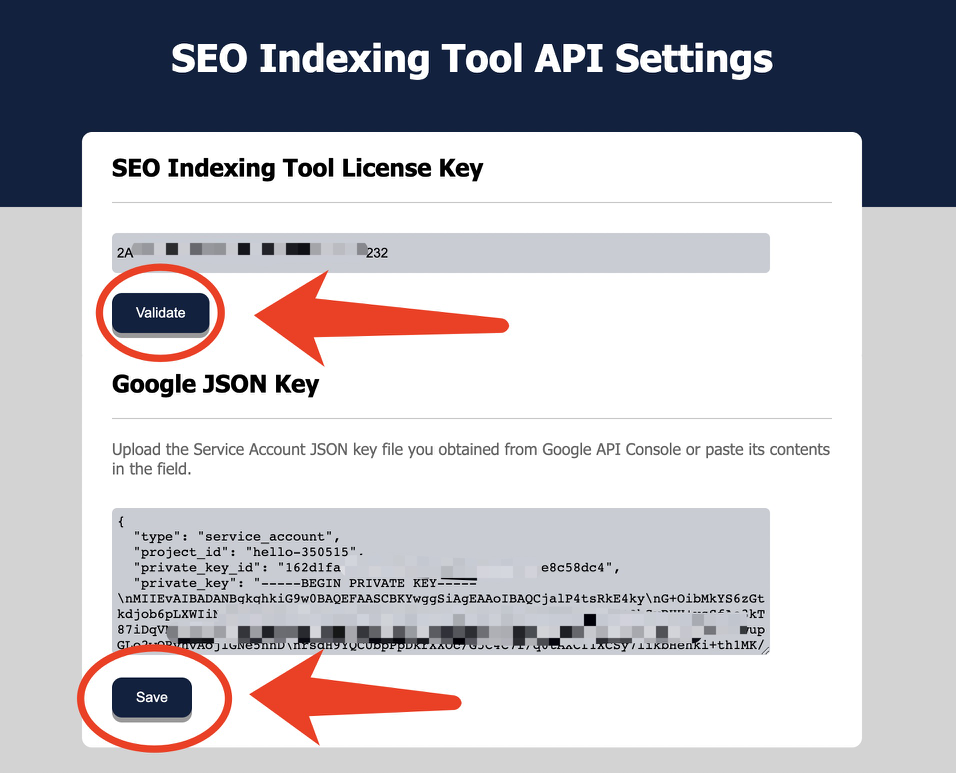
There are 2 things you’ve created in the previous steps:
1. License Key
2. Google JSON Key
Now just paste both of them into the right position on the settings page, and click Validate and Save.
Congratulations! You’ve done all the settings and you can now index all your pages without delay!
Here is a video that showing how to use this small but powerful Chrome Extension: